Creating and assigning permissions
The six default permission definitions are a good start for most organizations. You can create new ones that fit the way you work. A definition gives nobody anything by itself: it matters once you assign it to a person, team or expert company somewhere in the inventory, and a person's permission is computed from all their assignments. We recommend reading The dynamic permission model first.
Creating a permission
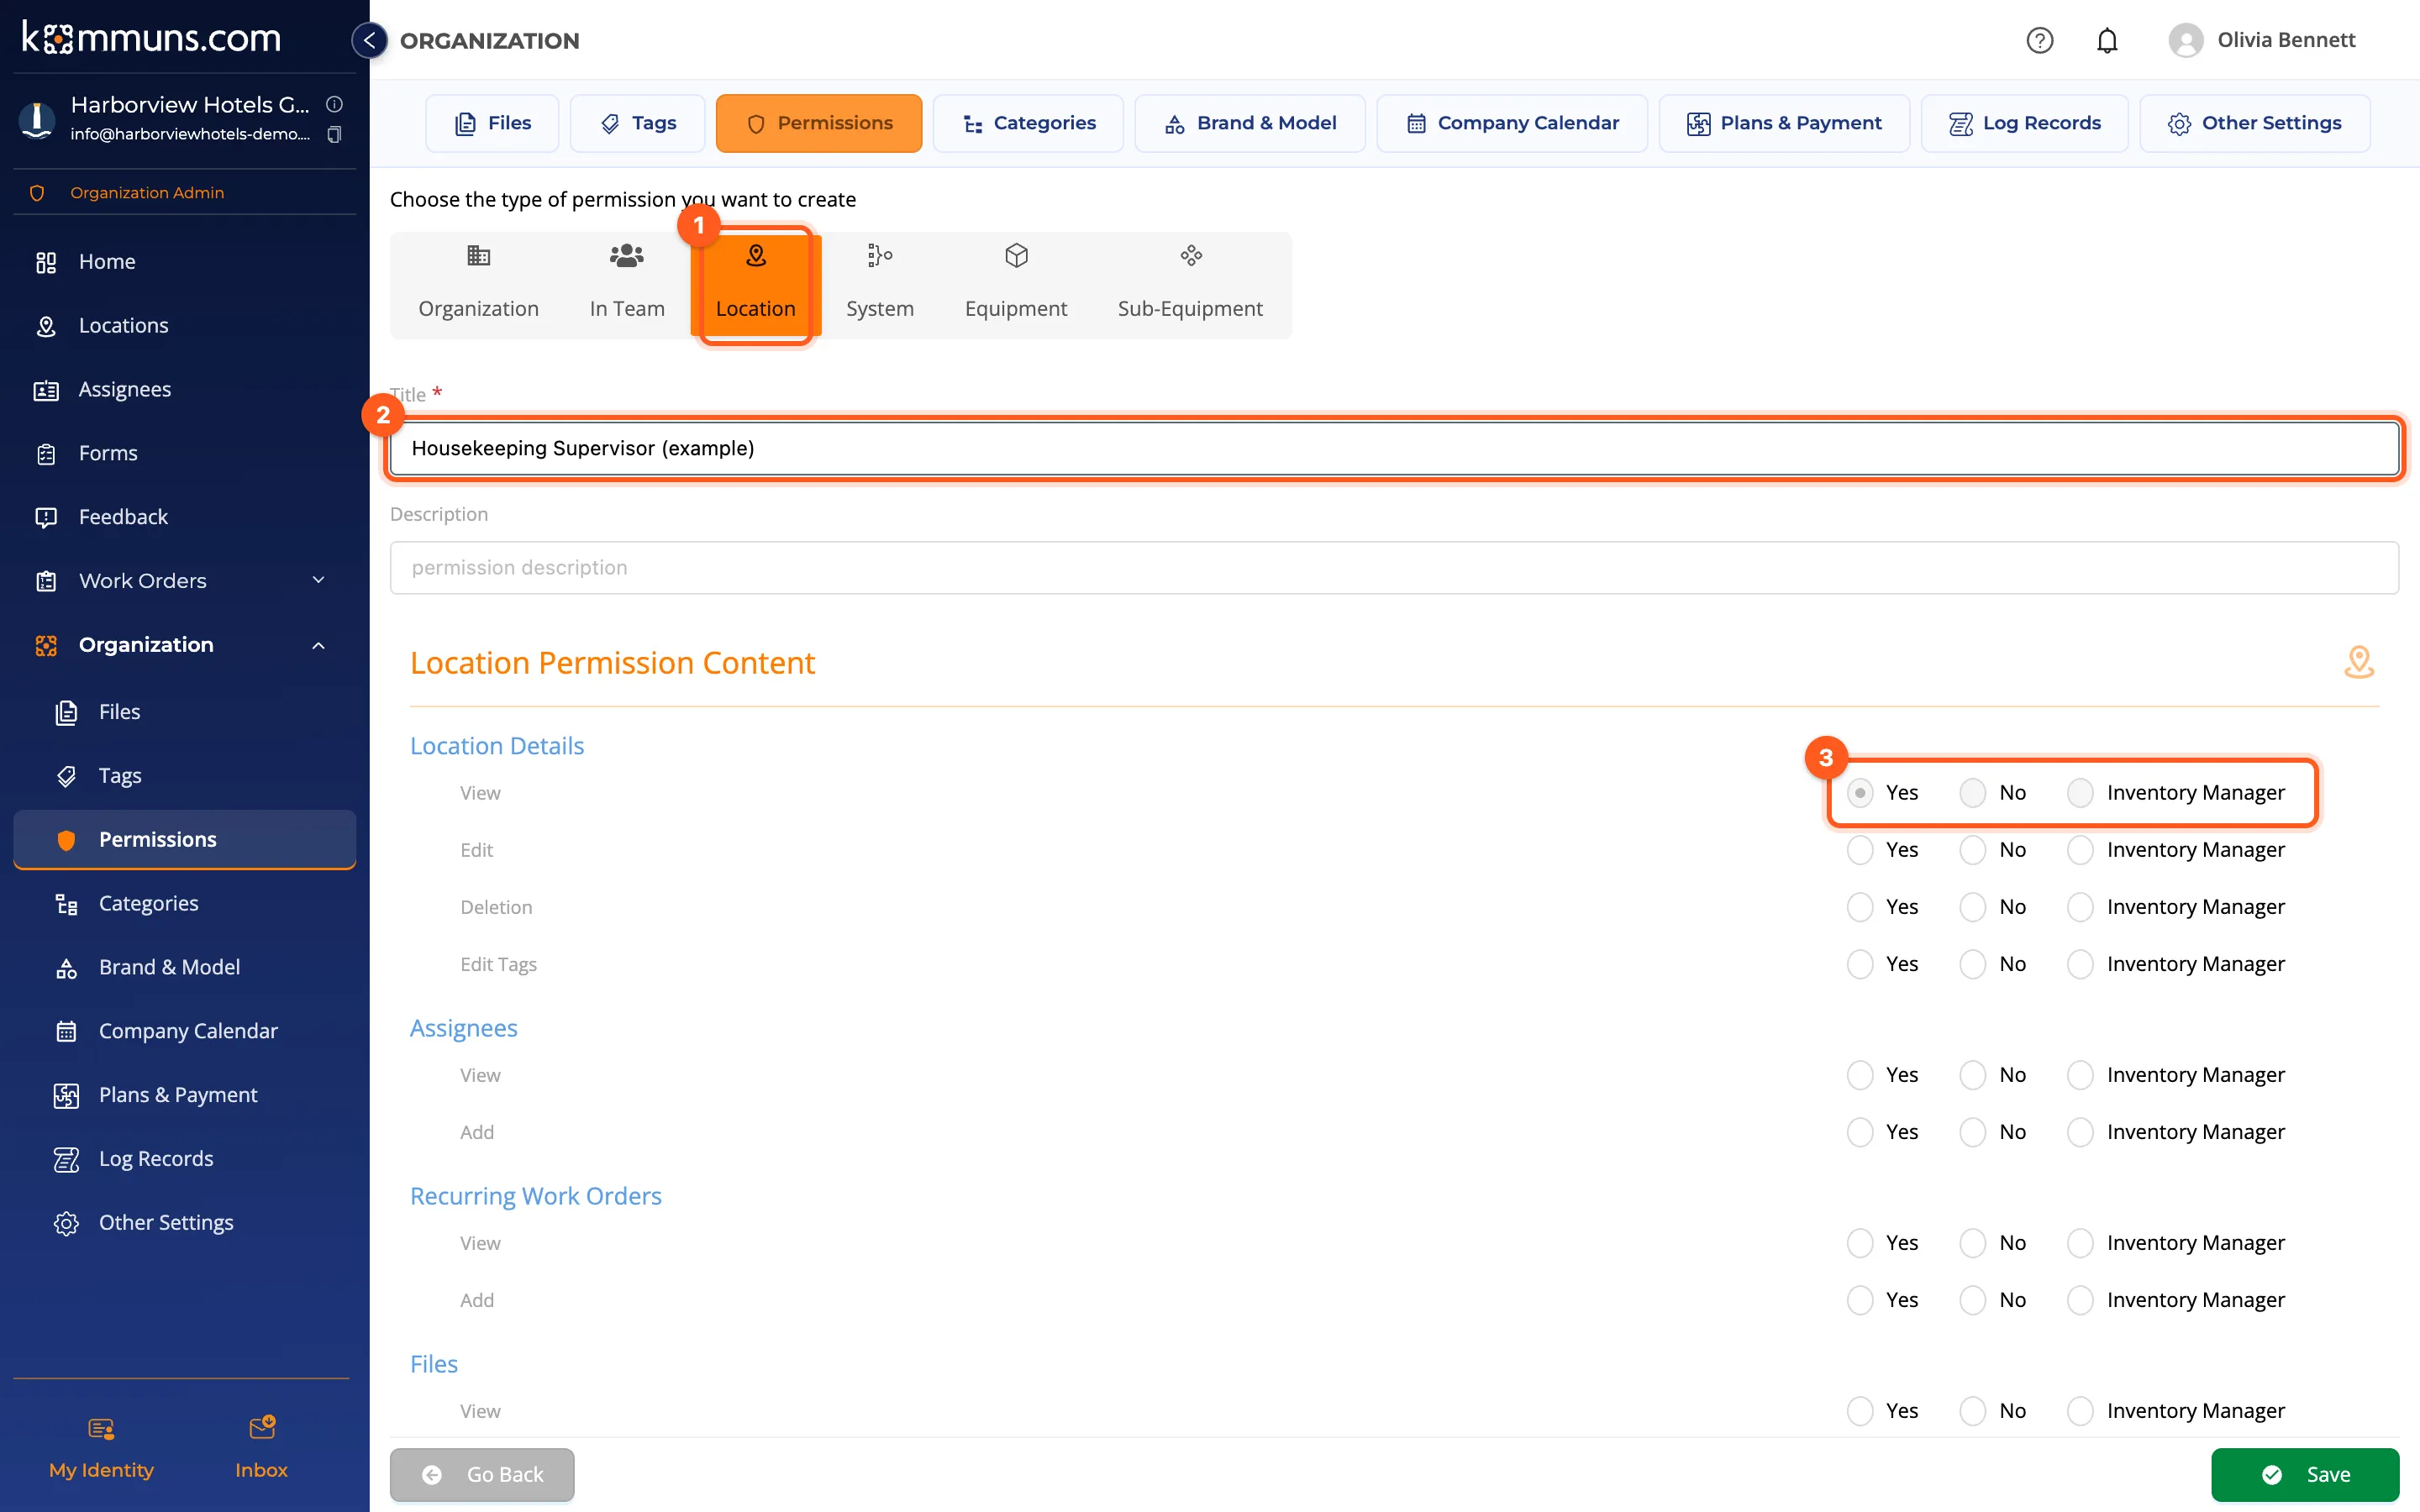
- Open Organization › Permissions. All permissions of your organization are listed with their kind.
- Click Create Permission.
- Choose the kind of permission: Organization, In Team, Location, System, Equipment or Sub-Equipment.
- Enter a Title (the permission's name, e.g. Technician) and a Description.
- In the permission list choose Yes, No or Inventory Manager for each row.
- For the permission to apply below the place where it is given, turn on the switch at the end of the form and choose the lower-level permissions: Add Location Permission in an Organization permission, Add System Permission in a Location permission, Add Equipment Permission in a System permission, Add Sub-Equipment Permission in an Equipment permission. Otherwise the permission applies only at the level where it is given.
- Click Save.
Assigning a permission
| Kind | Where is it assigned? |
|---|---|
| Organization | When inviting an employee (Permission Selection) or in the employee's Edit Permission window in Assignees › Employees |
| In Team | To members when creating a team |
| Location, System, Equipment, Sub-Equipment | Assign › Define an additional permission on that inventory's Assignees tab |
Assign
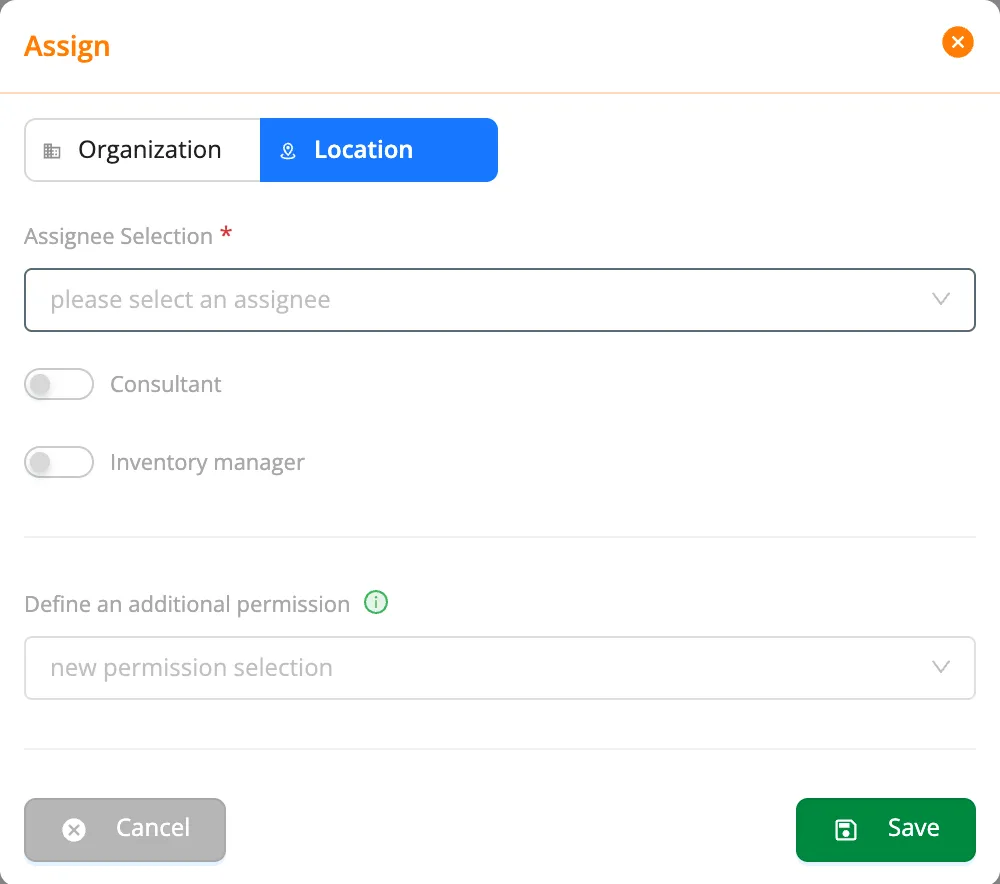
- Open the location, system or equipment and go to its Assignees tab.
- Click Assign.
- At the top of the window choose the level to pick the assignee from (Organization, Location…). The employees, teams and expert companies of that level appear in Assignee Selection.
- Turn on Consultant (reviewer) and Inventory manager if needed.
- Choose the permission that applies on this inventory in Define an additional permission and click Save.
Sample setups
There are no roles in kommuns, but here is a starting point for common jobs. Adapt it to your needs.
| Job | Organization-level assignment | Assignment on the inventory | Note |
|---|---|---|---|
| Director of engineering | Organization Admin | — | Sees and manages everything. |
| Chief engineer / site manager | Organization Employee | Location Manager (on their location) | Opens, assigns and cancels work orders at the location. |
| Maintenance technician | Organization Employee | Your own Technician location permission: sees the inventory, opens work orders and issue reports, works on assigned work; plus inventory manager of the systems they look after | Set permissions like delete to Inventory Manager to limit them to their own systems. |
| Staff who report issues (front office, housekeeping, security) | Organization Employee | Location Employee, or your own Front Office — Report Issues | They can report issues at the location. |
| Service contractor | Organization Employee (partner invitation) | Your own system permission (e.g. Service Contractor — System Maintenance) | See Working with business partners. |
| Inspection / consulting firm | Organization Employee (partner invitation) | Your own system permission, Consultant switch on | Reviews the work orders. |