Inviting employees
Your employees use kommuns with their own accounts. You invite them with their e-mail address; once they accept, they appear in your organization's Assignees › Employees list.
Steps
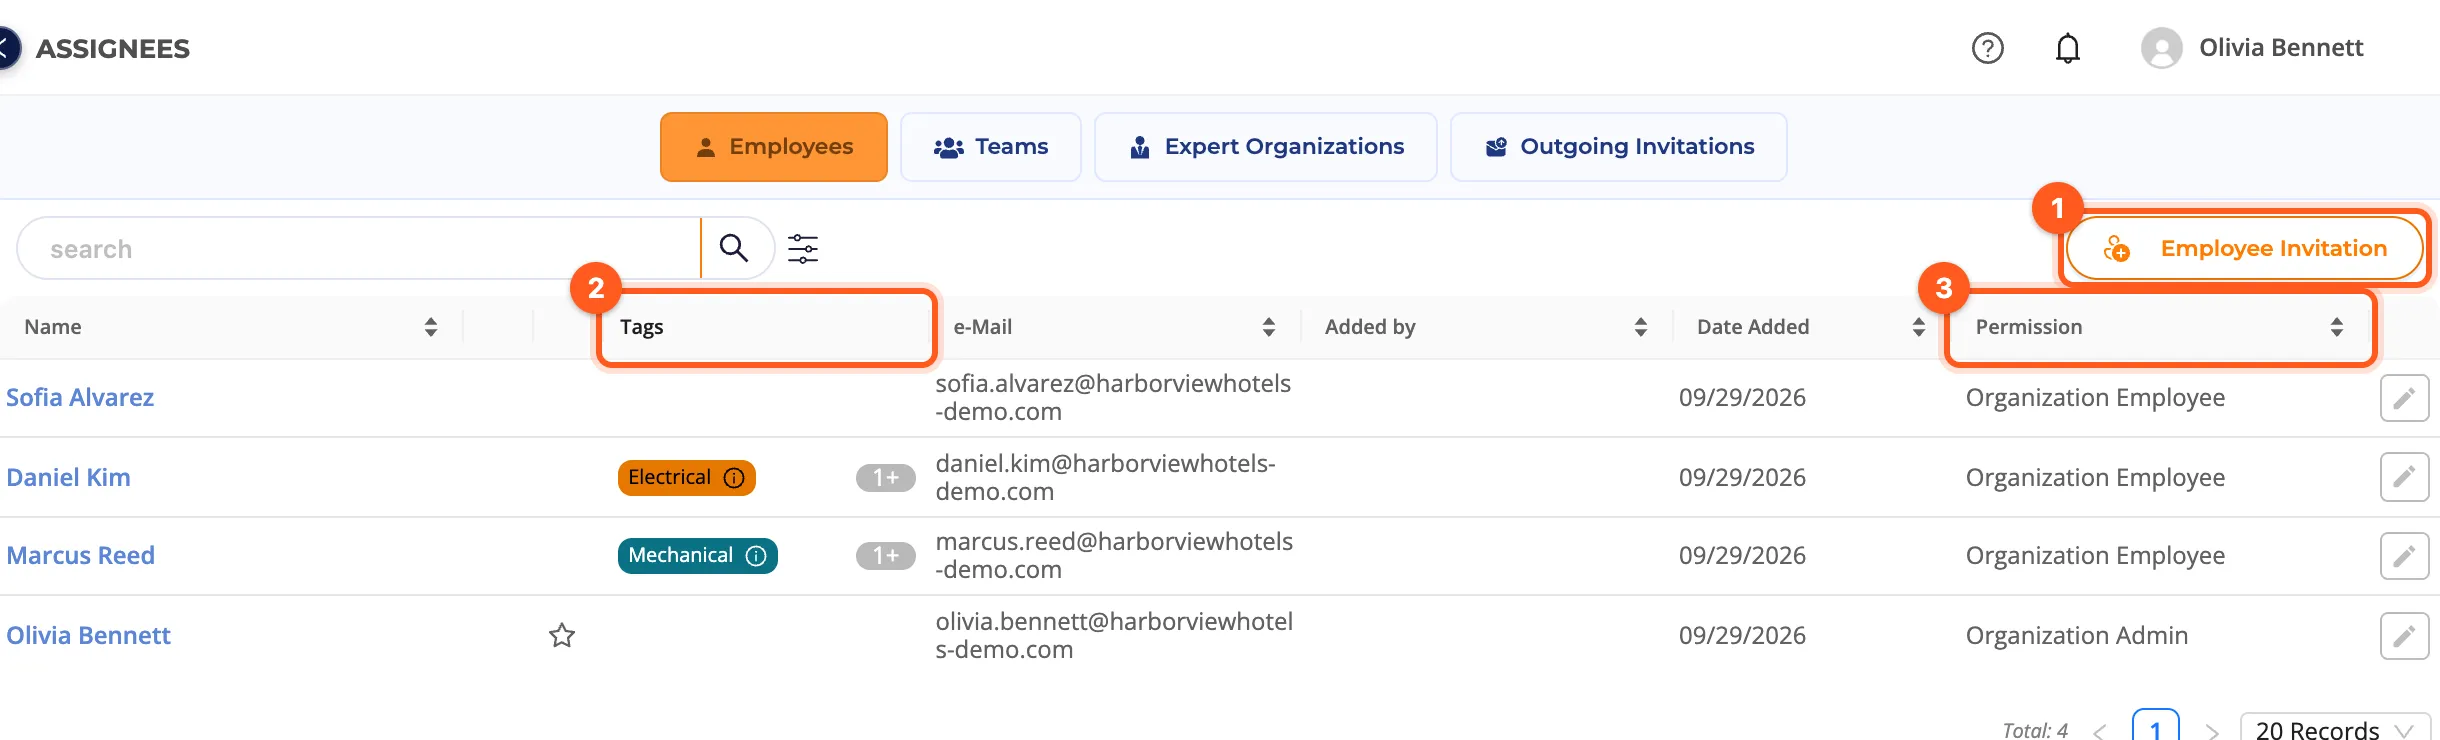
- Click Assignees in the side menu. The Employees tab opens.
- Click Employee Invitation at the top right.
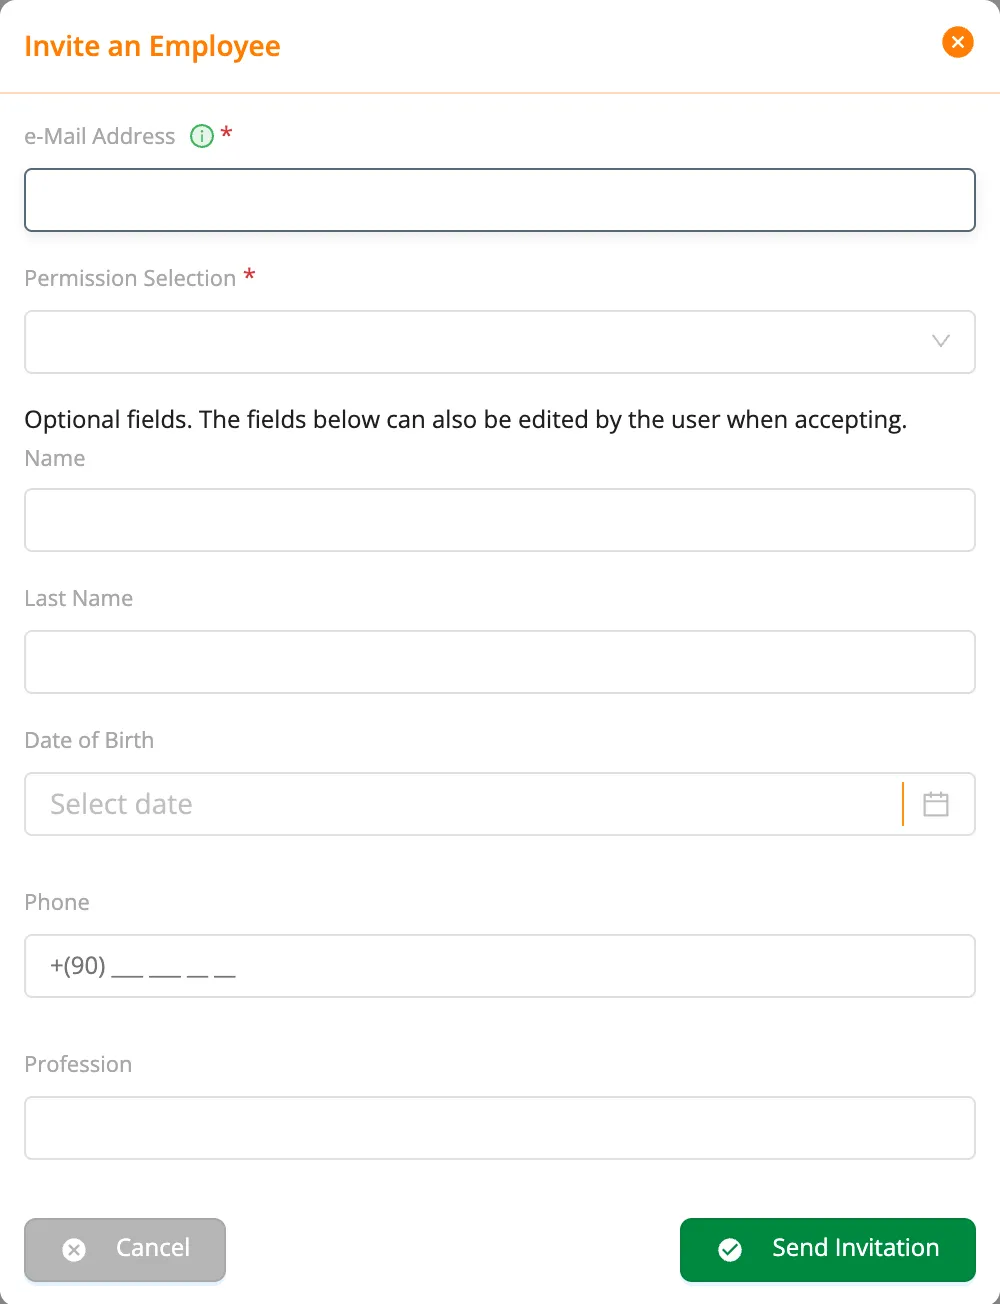
- Enter the e-Mail Address. The invitation is sent there.
- Under Permission Selection, choose the employee's organization-level permission (e.g. Organization Employee). This is their first assignment; their permissions on locations and systems come from later assignments.
- Optionally fill in Name, Last Name, Date of Birth, Phone and Profession. These are not required; the employee can edit them when accepting.
- Click Send Invitation.
The invitations you send are listed on the Outgoing Invitations tab.
How does the employee accept?
- Without a kommuns account: they create one from the link in the e-mail (Signing up). After signing in they open the invitation card in the Lobby and click Accept.
- With an account: the invitation appears in the Lobby when they sign in; they click Accept.
Once accepted, your organization appears under my organizations in the employee's Lobby.
Give the employee a permission on the inventory
The organization-level Organization Employee permission alone does not show any locations, systems or work orders. An employee who has accepted sees empty lists on Home until you give them a permission on a location or system.
After the invitation, open the location (or system) where the employee will work, go to its Assignees tab, add the employee with Assign and give them a location permission (e.g. Location Employee or your own Technician). See Inventory managers and Creating and assigning permissions.
If all your employees should see all locations, edit the organization permission and define location-level permissions with Add Location Permission; then you do not need to assign them location by location.
Tags
Add tags to employees to make their skills and duties visible in lists (e.g. Mechanical, Electrical, Shift lead, First aid certified). Tags are defined under Organization › Tags. The edit icon at the end of an employee's row opens Edit Permission, where you change their tags, their organization permission and whether they are active.