Importing from Excel
Instead of creating many systems, equipment and sub-equipment one by one, add them with an Excel file: download the template, fill it in, upload it again. kommuns reads and checks the file and shows a preview; nothing is saved until you confirm.
Where?
The Import button is in the lists' toolbar, next to Export. Each place imports what goes under it:
| Where | What can be added |
|---|---|
| A location's Systems list | Systems, equipment and sub-equipment |
| A system's Equipment list | Equipment and sub-equipment |
| An equipment's Sub-Equipment list | Sub-equipment |
The same window opens from the card's ⋮ menu (Import) in the Locations tree. Without the permission to add inventory there, the button doesn't show.
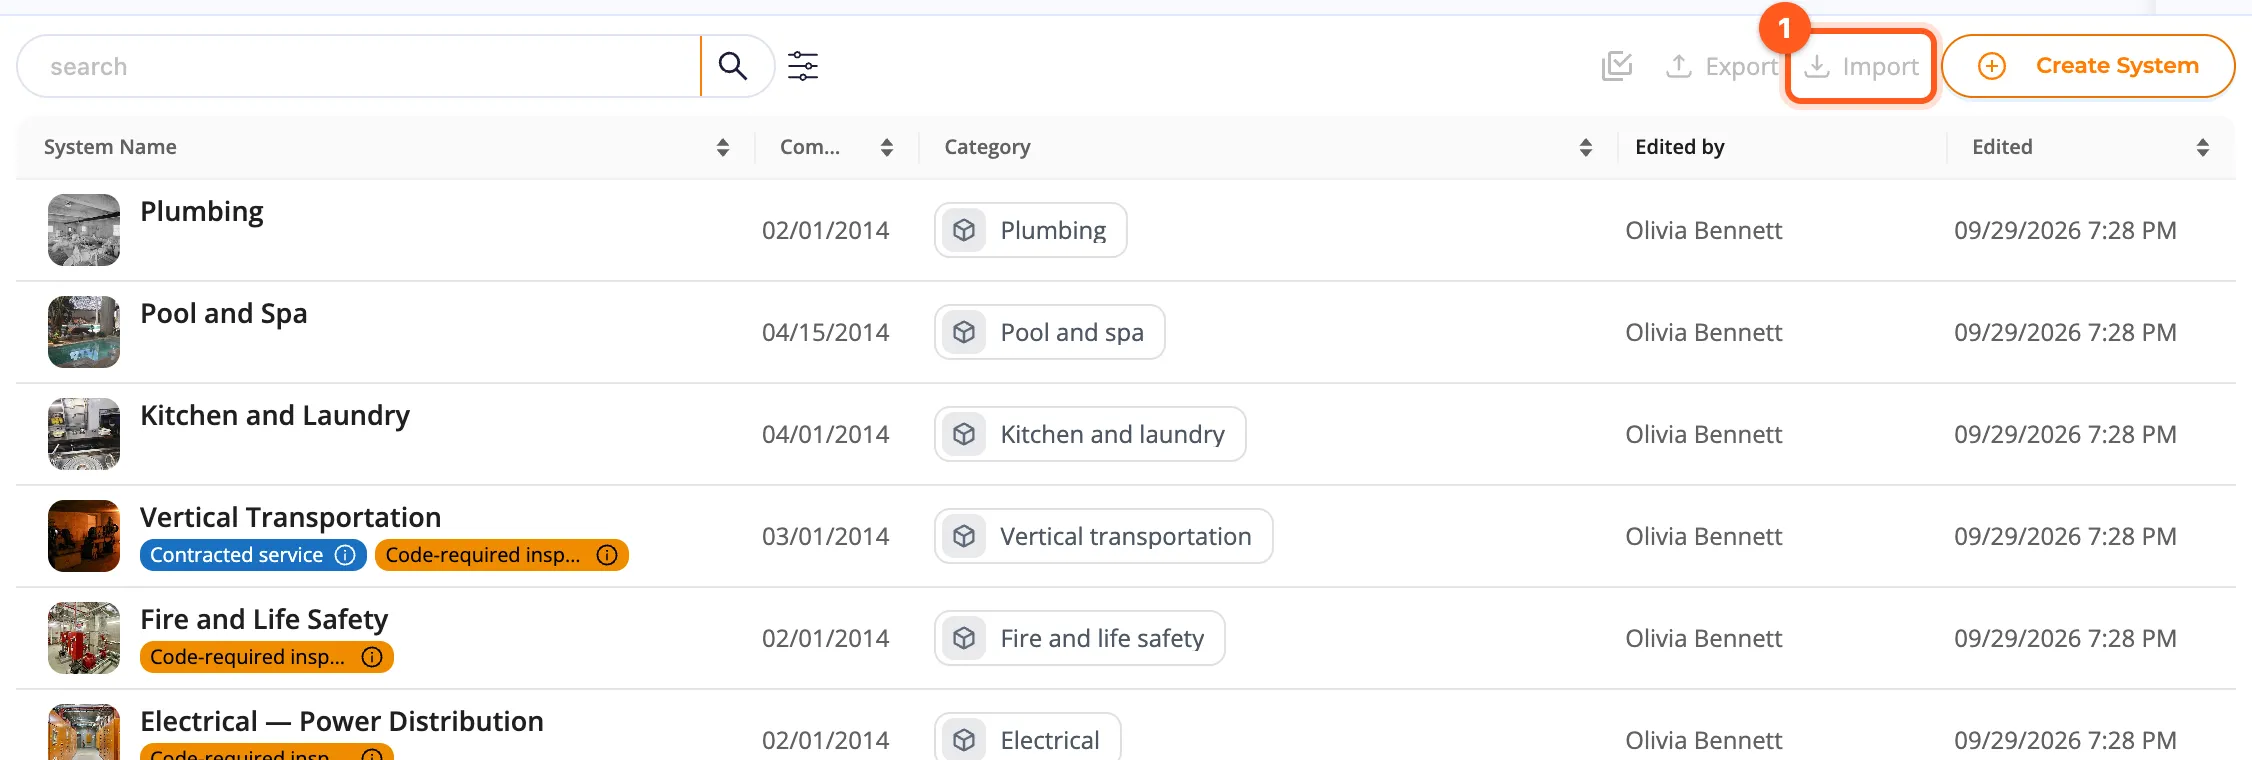
1. Download the template
The window has three steps: Template, Upload, Preview. In the first one click Download Template. The
template is made at that moment for that place: the headers are in the app's language, the required ones (*) orange;
the drop-down lists (Type, Active) are ready.
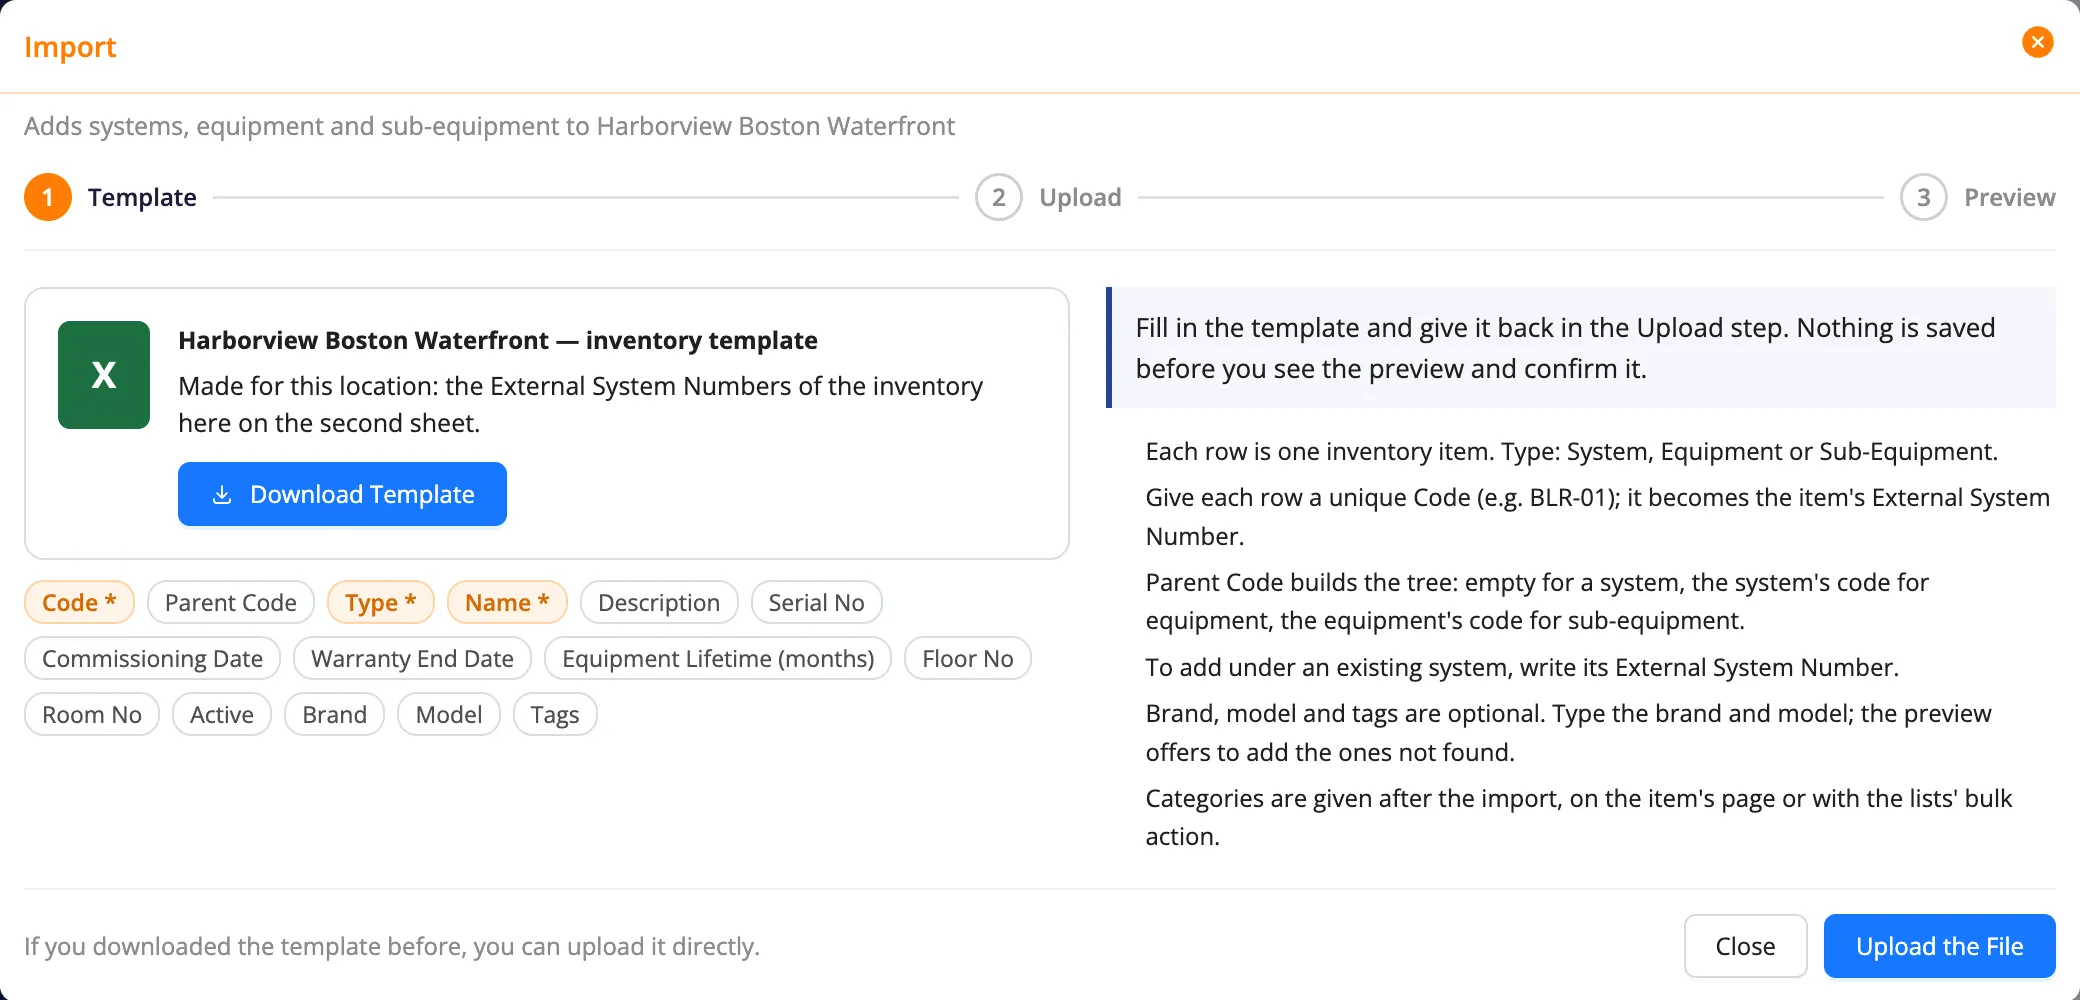
If you downloaded the template before, go straight to Upload the File.
2. Fill in the template
The file has three sheets: Inventory (the one you fill in), How to Fill In (a short guide and the External System Numbers of the inventory already in that place) and a hidden sheet for the drop-down lists. Each row is one item:
| Column | What goes in |
|---|---|
| Code * | The row's unique code (e.g. BLR-01). It becomes the item's External System Number when saved. |
| Parent Code | Builds the tree: empty for a system, the system's code for equipment, the equipment's for sub-equipment. |
| Type * | System, Equipment or Sub-Equipment. |
| Name * | The item's name. |
| Description, Serial No | Free text. |
| Commissioning Date, Warranty End Date | An Excel date or DD.MM.YYYY. |
| Equipment Lifetime (months) | A positive whole number. |
| Floor No, Room No | Equipment only. |
| Active | Yes or No; empty means Yes. |
| Brand, Model | Optional, written by name (equipment and sub-equipment only). |
| Tags | Tag names separated by ;; the ones the organization doesn't have are created. |
A few rules:
- The order of the rows doesn't matter; Code / Parent Code build the tree.
- Adding under an existing item: write the External System Number of an item already in that place in Parent Code (you find them on the How to Fill In sheet).
- A system's template offers only Equipment / Sub-Equipment as Type. An equipment's template has no Type and Parent Code columns: every row is a sub-equipment under that equipment.
- Cells the type doesn't use (e.g. Brand on a system) are grey and not read.
- There is no Category column. Give categories after the import, on the item's page or with the lists' bulk action. An older file that still has a Category column isn't refused: the column isn't read and the preview shows a note.
.xlsxfiles only; at most 5 MB and 2,000 rows.
You can open and fill in the template in Apple Numbers too; the drop-down lists work there. Before uploading, save it as
.xlsx with File › Export To › Excel (a .numbers file isn't accepted).
3. Upload and read the preview
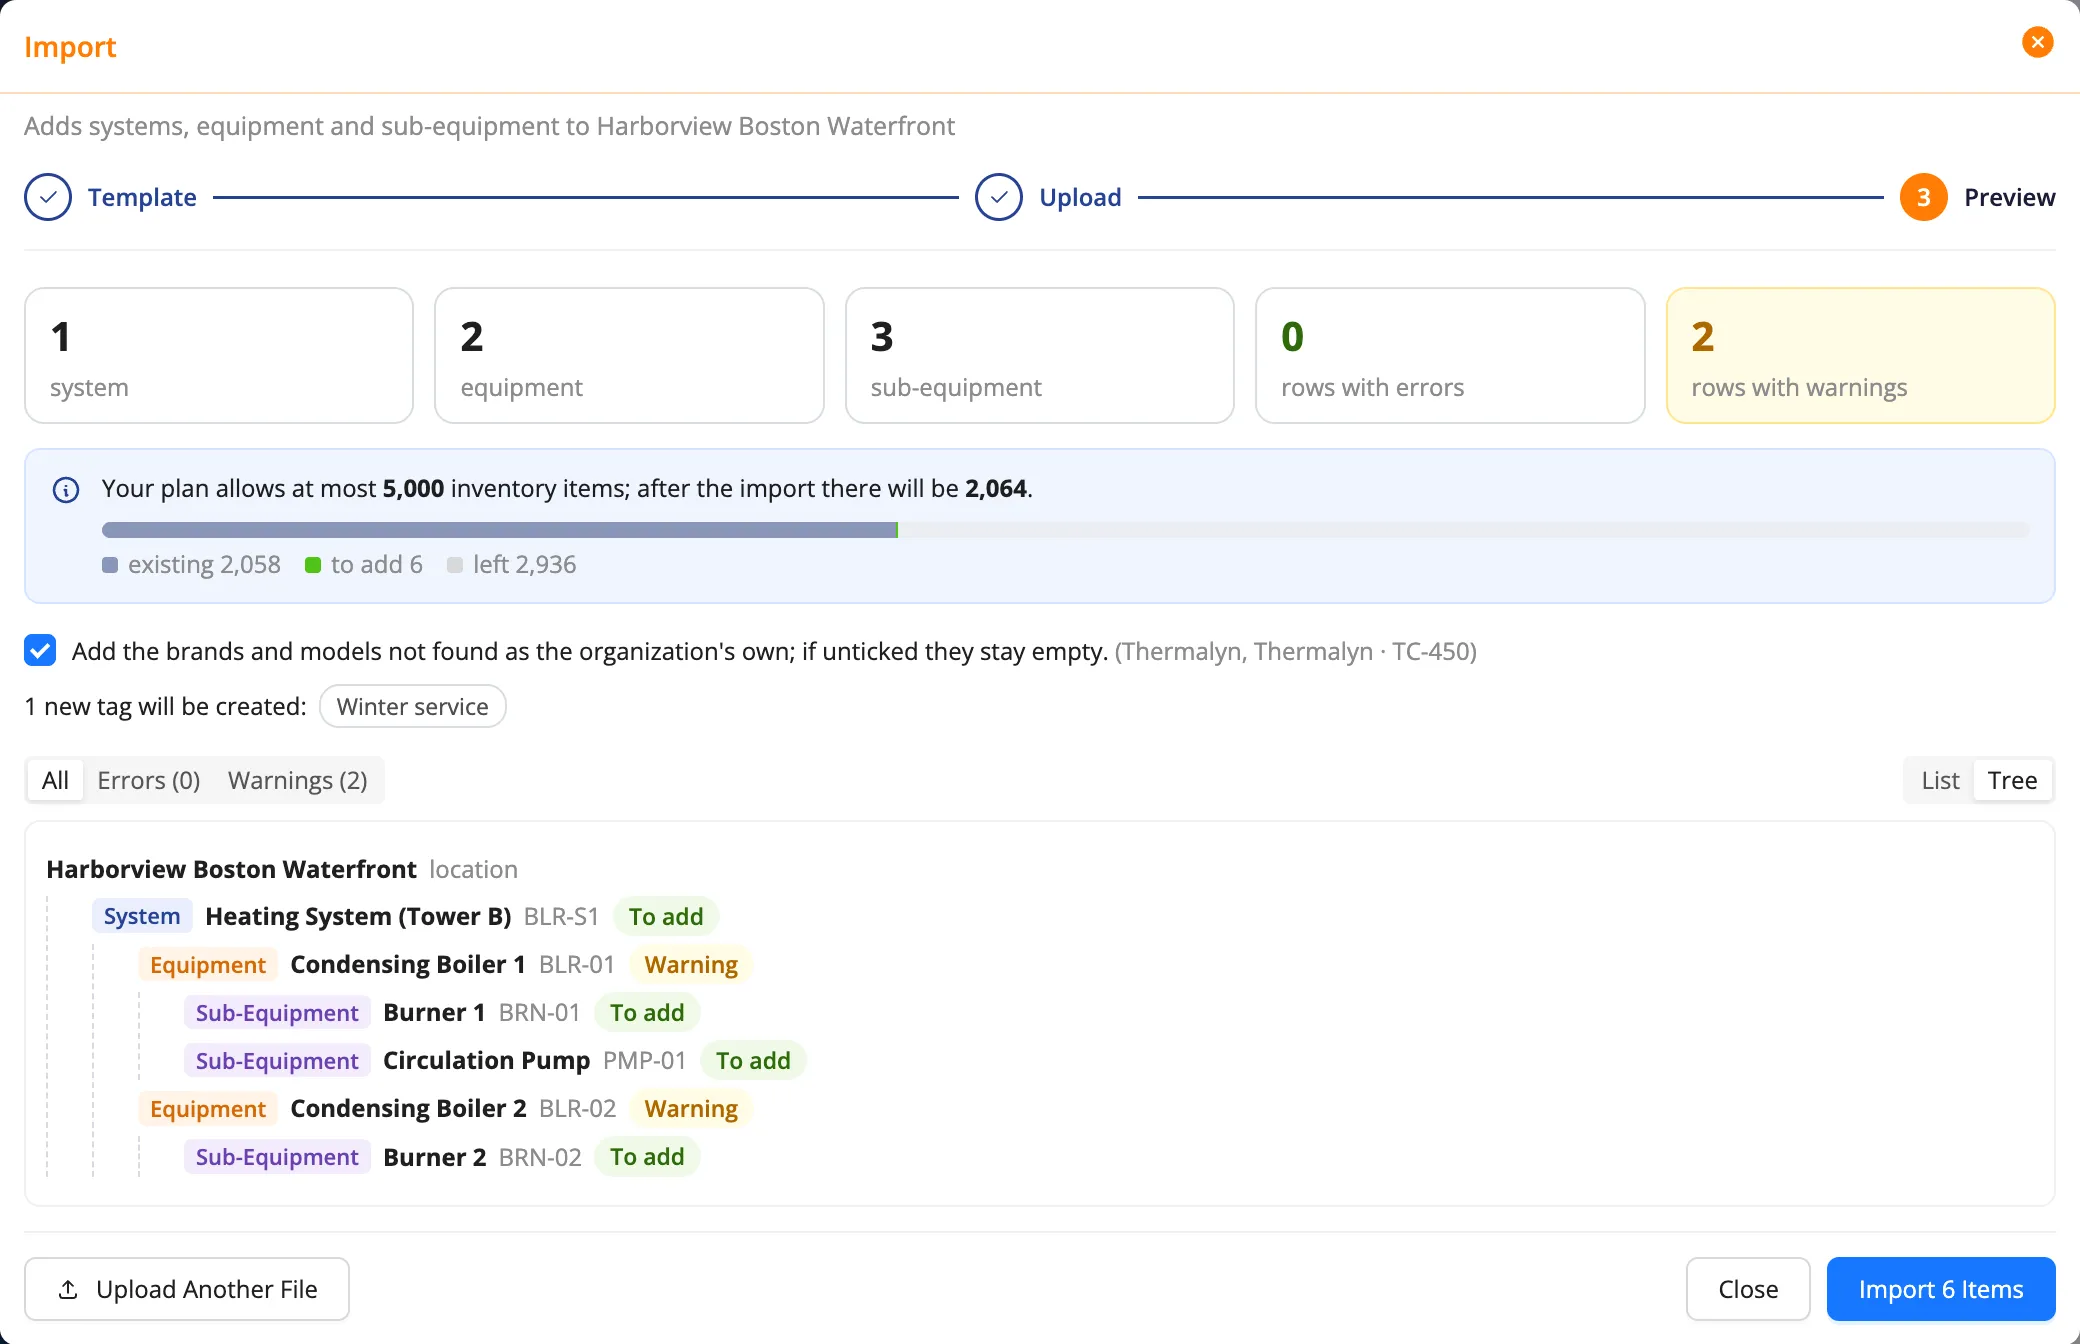
In the Upload step drag the filled file onto the box, or click and pick it. kommuns reads and checks the file, then shows the Preview: the numbers to add by type, the rows with errors and warnings, your plan's inventory limit and the rows.
Errors
While any row has an error, nothing is imported. The error is written under the row (e.g. "Parent Code “BLR-S9” is neither in the file nor in this location."). Download Rows with Errors downloads the file you uploaded with an Error column next to the rows with errors; fix the file and upload it again with Upload Another File.
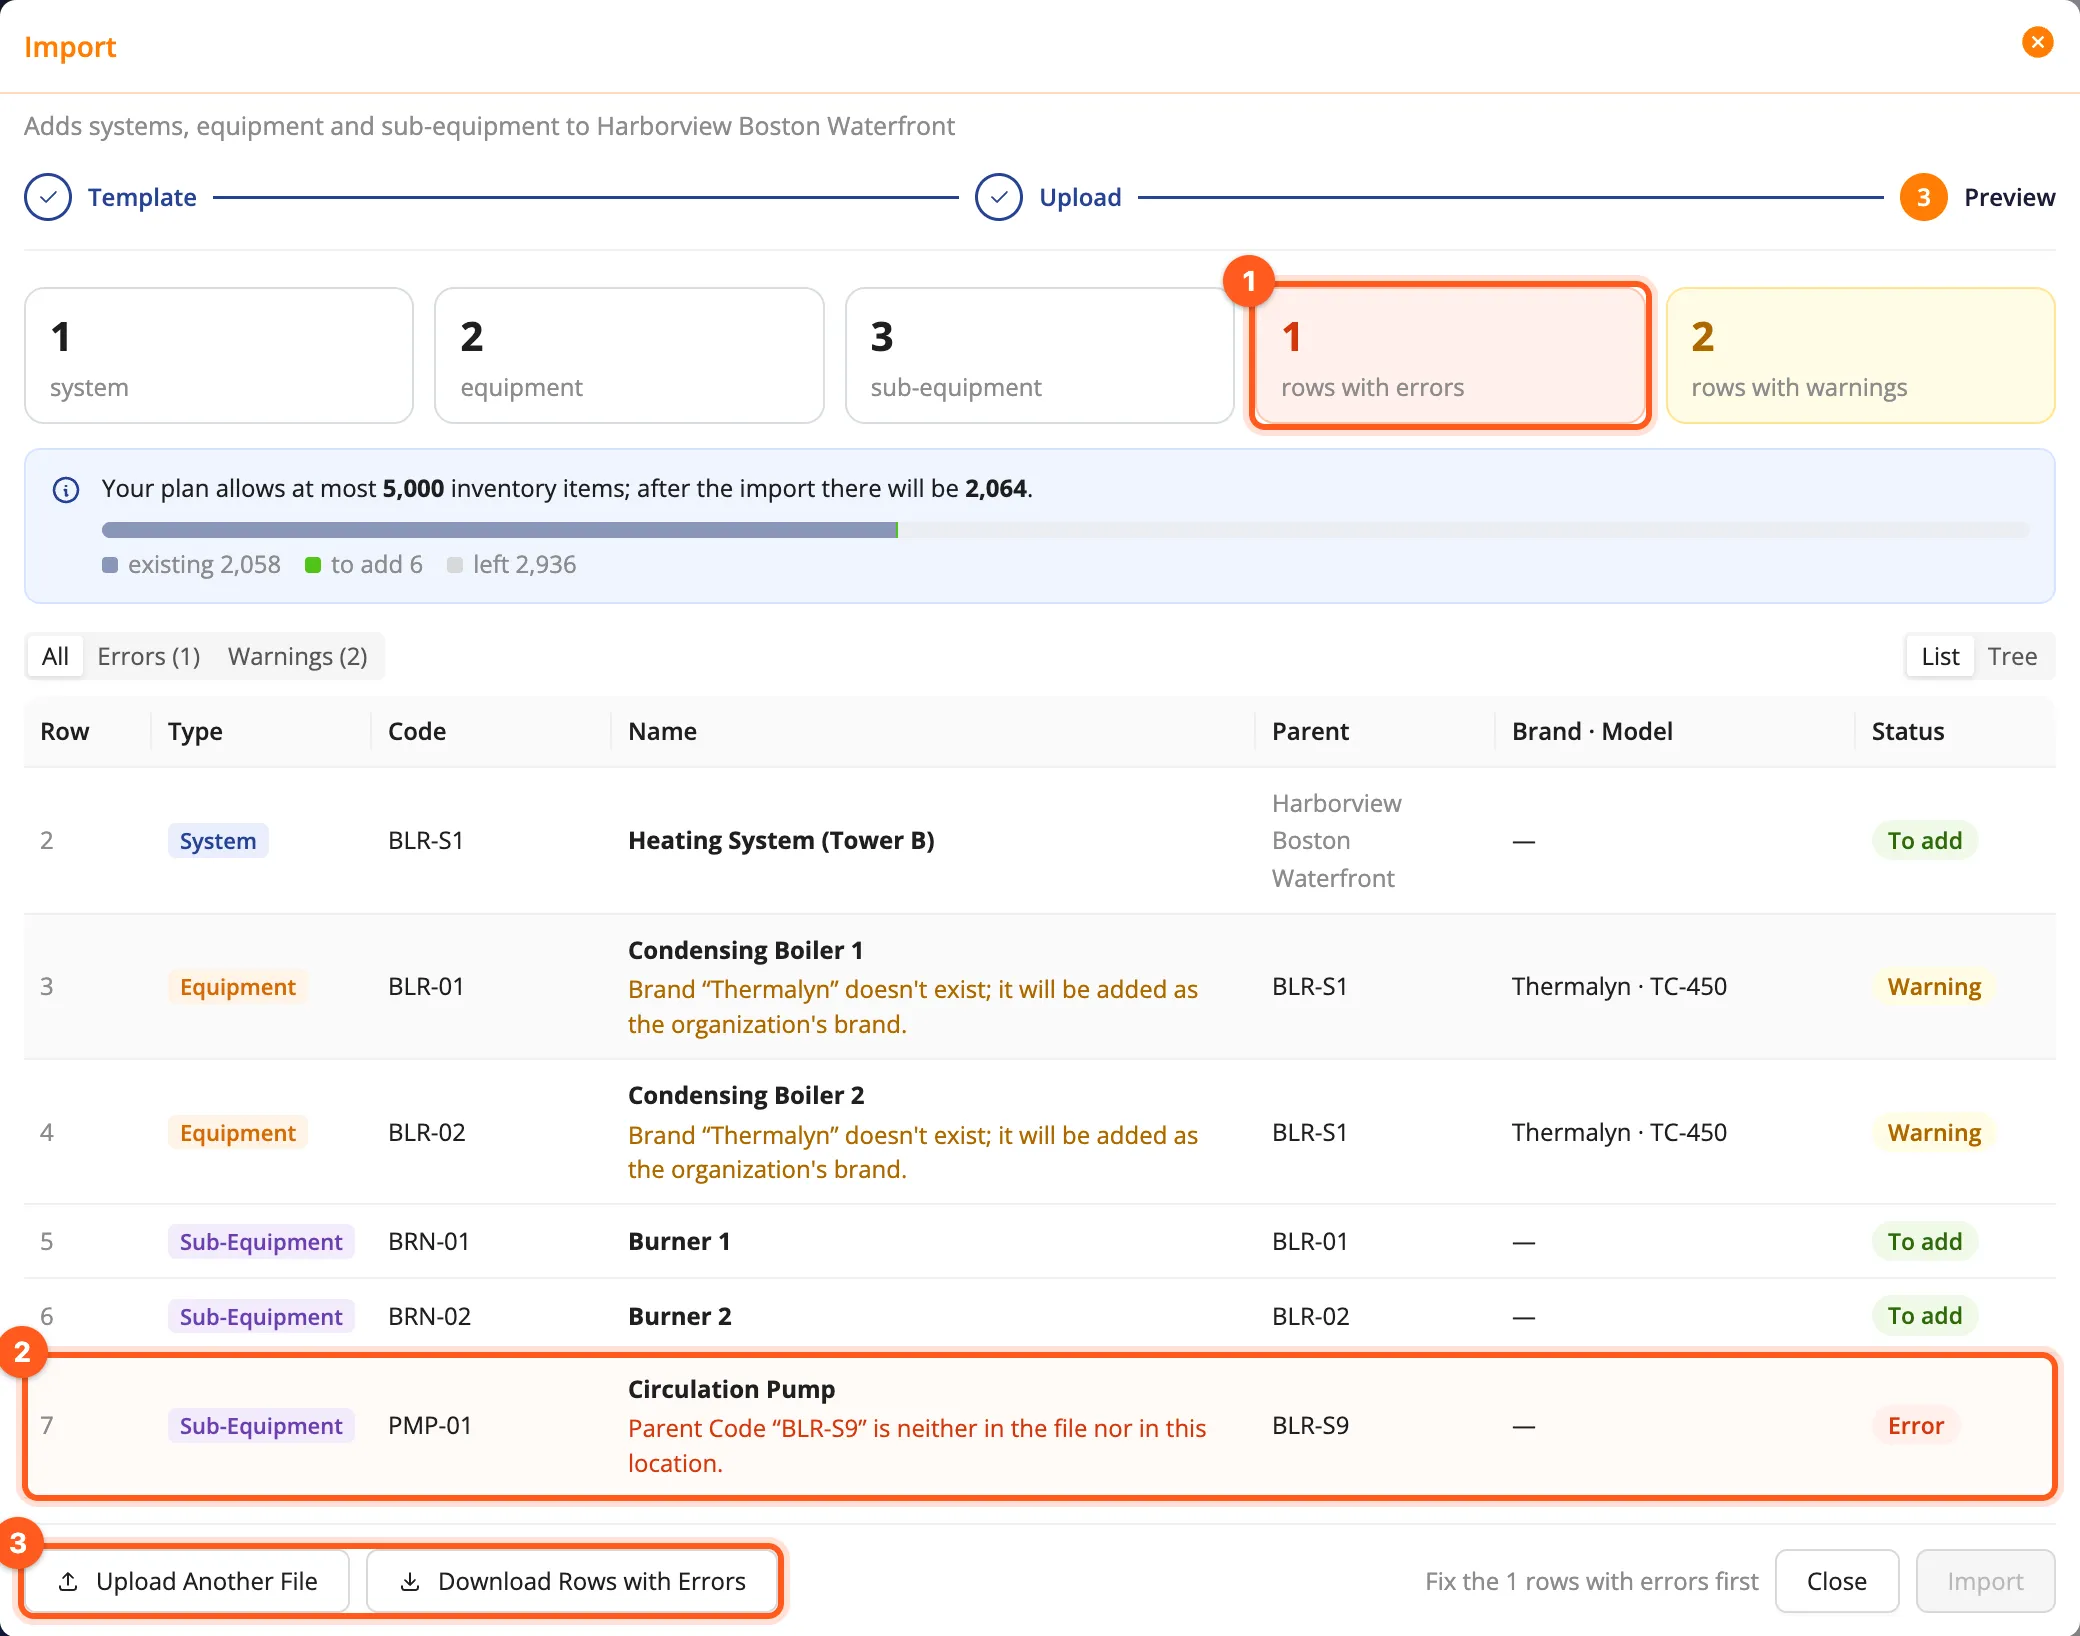
Errors are: an empty Type or Name, a Code that appears twice in the file or is another item's External System Number in the organization, a Parent Code that isn't found or of the wrong type, a date that can't be read, an invalid Equipment Lifetime or Active value.
Warnings and suggestions
Warnings don't stop the import:
- Brands and models not found: with Add the brands and models not found as the organization's own ticked they are added as your organization's brand / model (Brands & Models); unticked those fields stay empty. Only people with the Brands & Models permission see this choice.
- New tags: tags the organization doesn't have are created; the preview names them.
- Filled cells a type doesn't use are ignored.
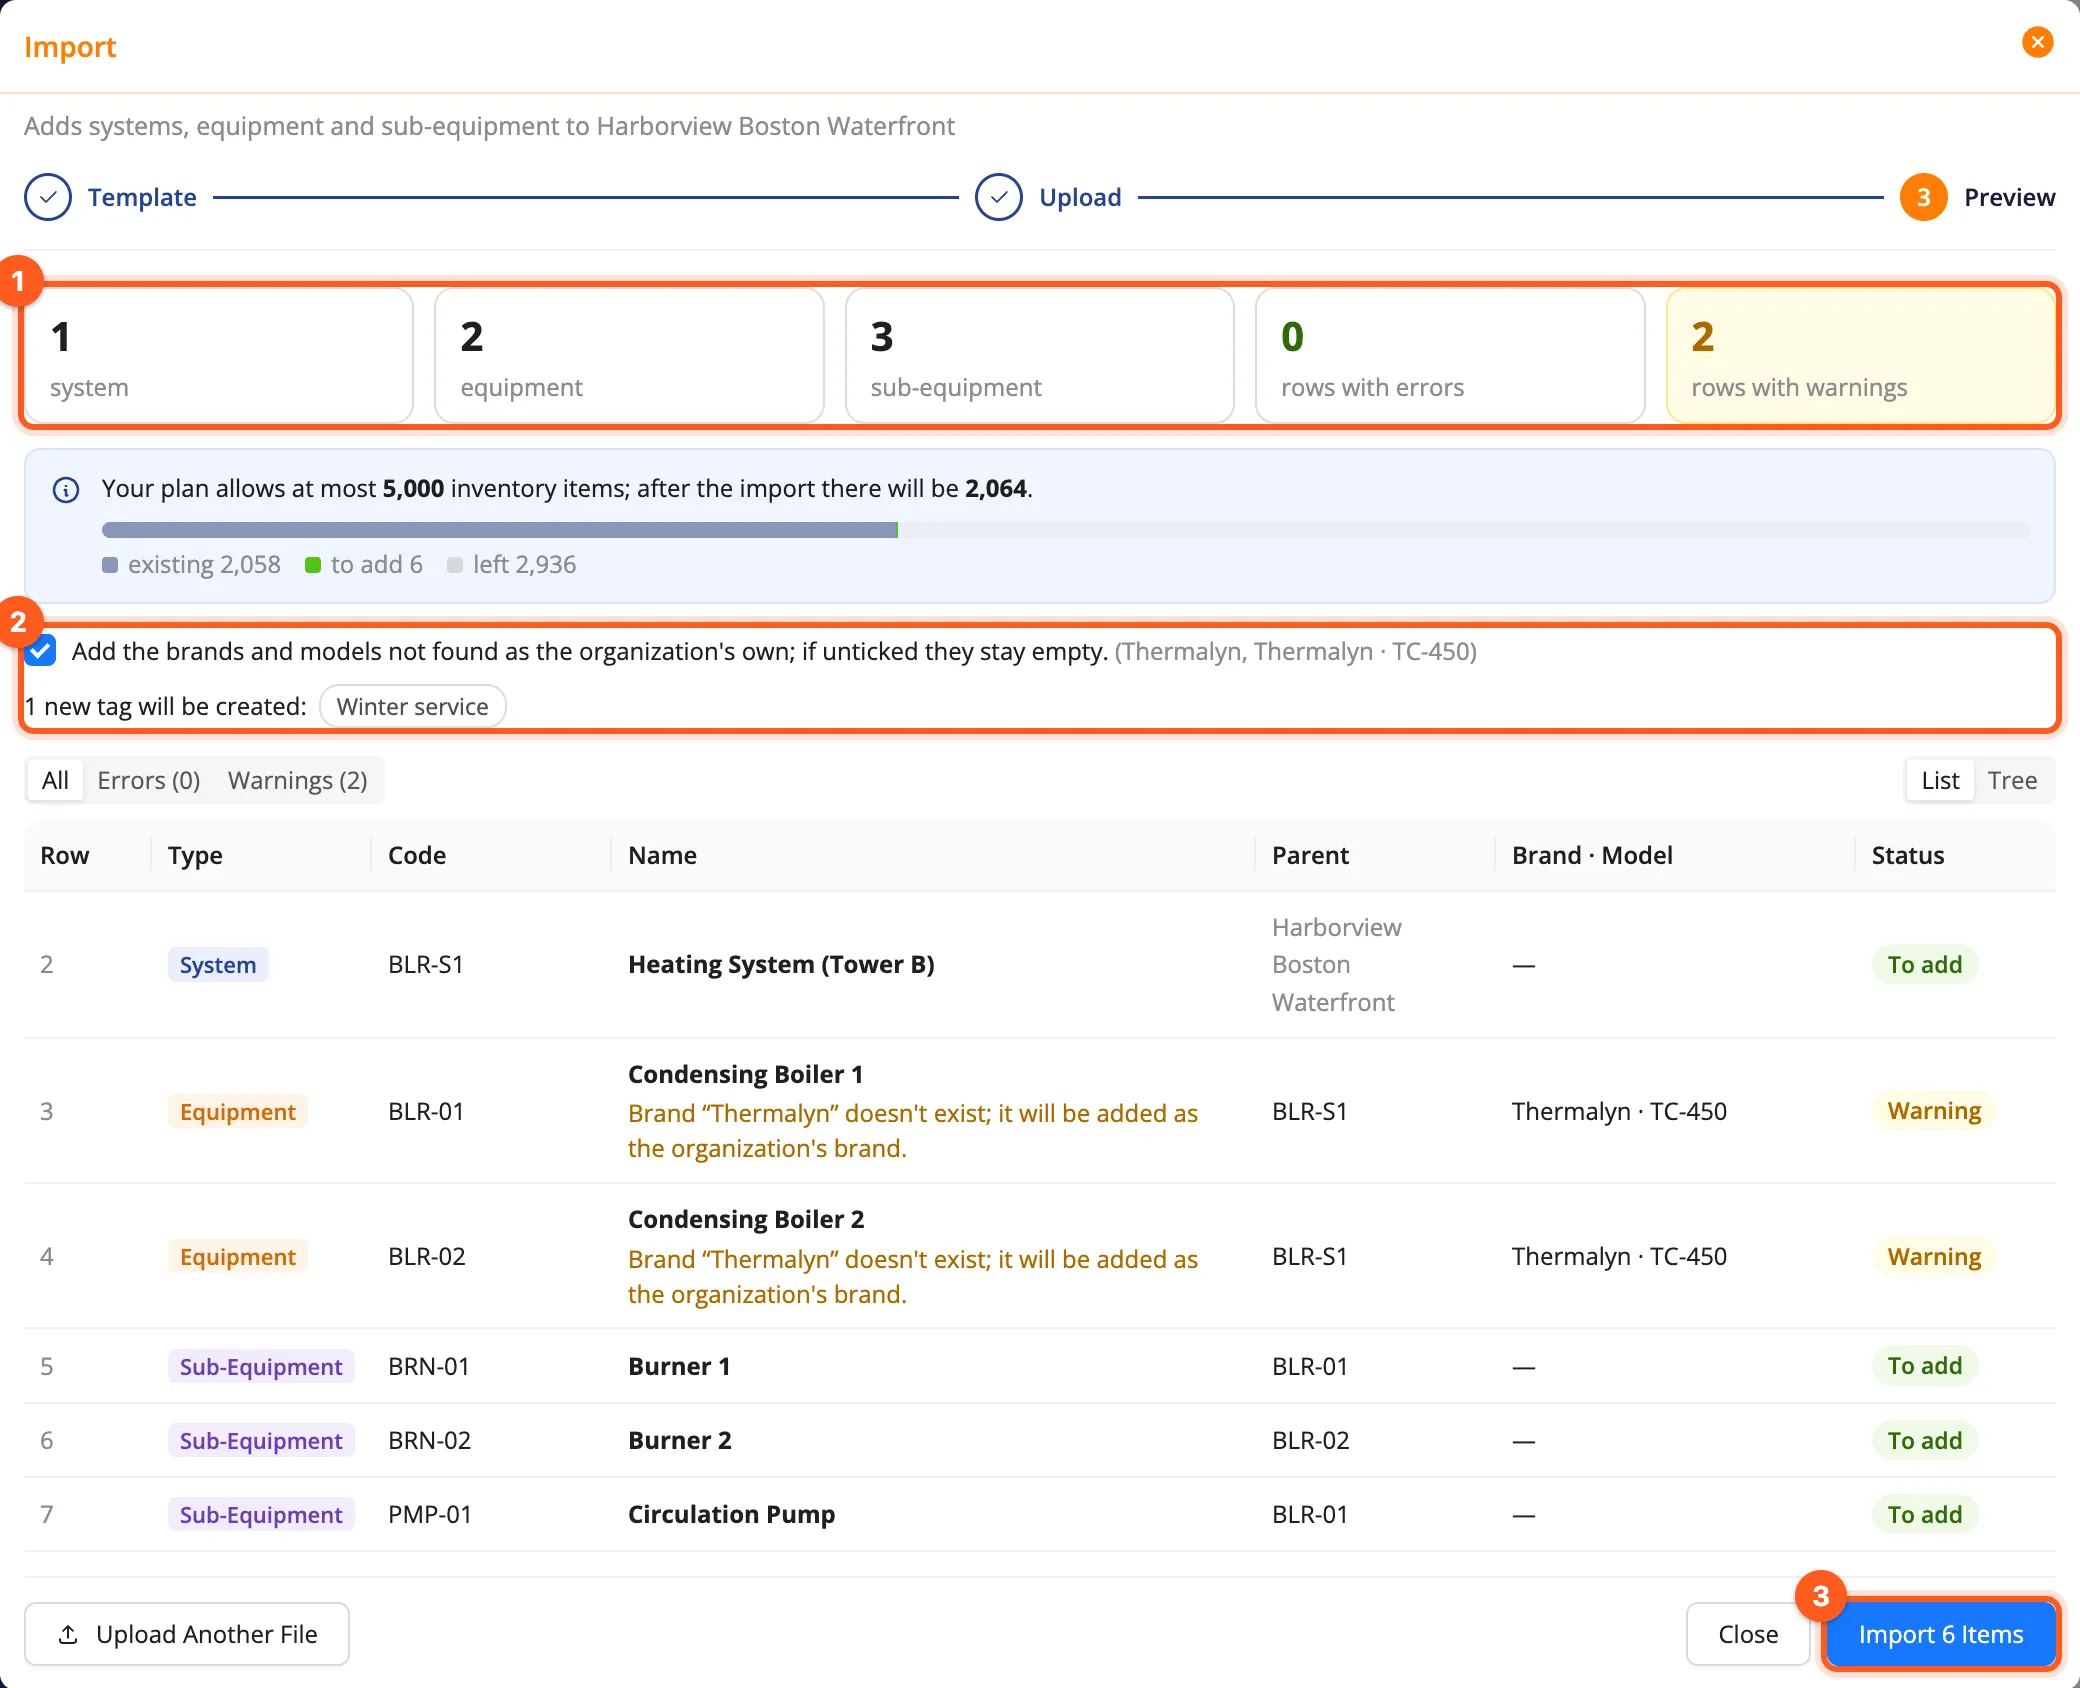
List / Tree shows the rows as a tree too; parents that already exist are marked "already there".
Plan limit
If your plan limits the inventory, the preview shows today's count, the items to add and what is left. A file over the limit isn't imported: the red warning tells how many items the file may have at most; cut the file down to that many rows and upload it again, or upgrade your plan.
4. Import
Without errors the button tells how many items will be added (e.g. Import 6 Items). Clicking it saves every row at once: if even one can't be saved, none is. The last screen tells how many items were added and the brands, models and tags created. The import shows as one record in the Activity Log.
The imported items keep their codes as their External System Number: when you later add more under the same place with another file, you can write these codes in Parent Code.
Importing adds new inventory; it doesn't update existing items. The mobile app has no import.